


All Ancient Map Callouts in CS2

Despite being relatively new, Ancient is one of the most strategic and terrain-heavy maps in CS2. With that being said, it requires precise teamwork and exceptional communication between teammates. To build up on your competitive play, Ancient callouts CS2 players use provide enough coordination to fend off attacks successfully, prepare executes, and to take control of the right spots. The map itself provides numerous obstacles ranging from different elevations to tight angles, while the jungle theme gives the map a unique feeling. In this guide, we will talk about the importance of understanding all Ancient map callouts and why this can help you get an edge over your enemies. With that being said, let’s dive right in and help you win more rounds on this CS2 map.
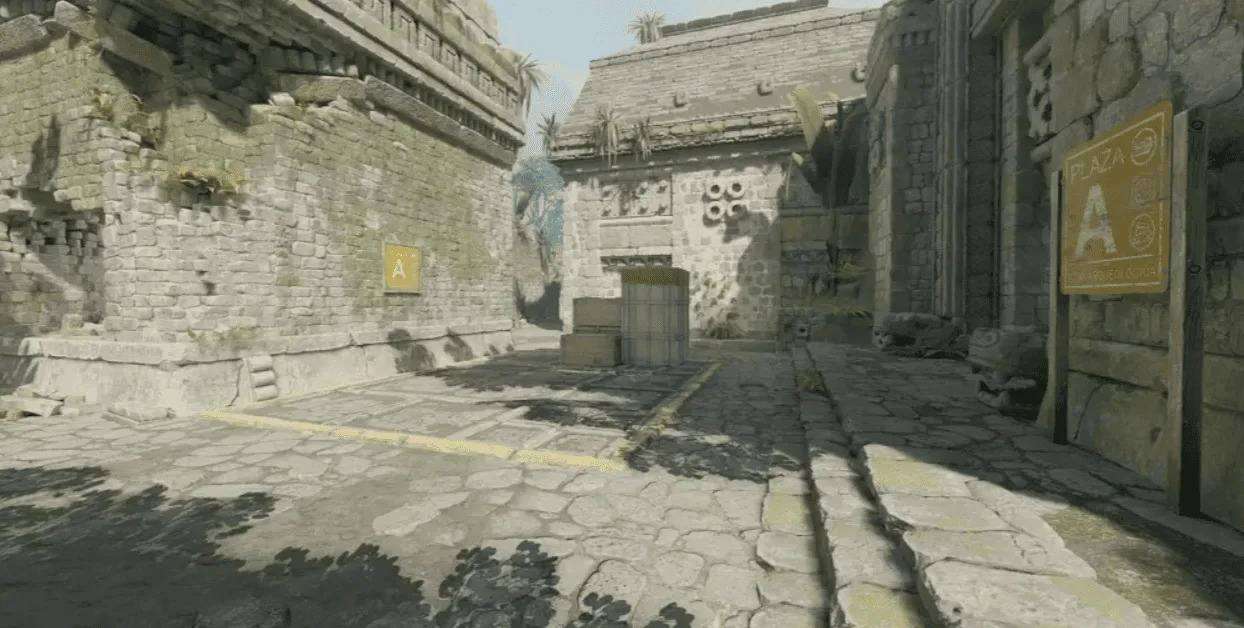
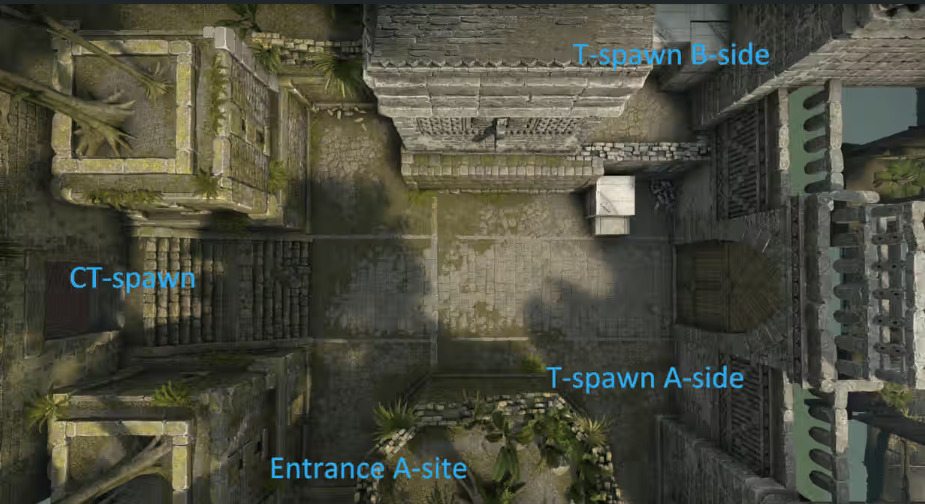
Ancient Map Overview – Layout, Terrain, and Key Combat Zones

Ancient is best described as a compact and tight CS2 map which is built around connected lanes and various elevations to keep things more interesting and provide obstacles for both attackers and defenders.
The map layout itself is based on two bombsites. The A site features an open courtyard covered in stone pathways. On the other hand, the B site revolves around tight corners and specific points of entry. Mid serves as an alternative for reaching either site. As a general rule on Ancient map, a team that holds Mid control wins the majority of rounds. With such control, players can create buffer zones around Donut or Cave. This provides additional pressure while such a play can easily call for rotations and weaken bombsites or presence across the map.
With the CS2’s update regarding the textures and lightning effects, some players might have problems adjusting to the Ancient CS2 map visibility due to the map foliage, terrain, shadows, and color variations. Different types of offsets provide additional problems to players who are not as mechanically skilled because crosshair placement must be adjusted constantly.
One of the reasons why players enjoy gunfights on Ancient revolves around the mixture of tight and narrow corridors that provide a great fit for gamers who like to rush and go for faster plays. Due to the fast-paced nature of rounds on this map, it is very important for players to disclose information properly, hence why CS2 Ancient callouts must be used.
What Are Callouts and Why They Matter on Ancient
Ancient callouts are very short and straightforward labels that are assigned to the most important locations on the map. Callouts provide the necessary information to teammates that can help broadcast information about the enemy position, potential rotation, and overall strategy you are trying to accomplish on the map.
When playing the game in a competitive mode, Ancient CS2 callouts play a vital role between losing or winning. Proper callouts can set up the team for success as they can synchronize the action on the map and make the attack or defense more lethal.
Unlike other maps, Ancient will punish teams that do not communicate and disclose information which makes callouts even more important. Due to multiple chokeholds and similar corridors, knowing exactly where to look or hold angles makes a big difference between winning and losing a round.
Because of various approaches to how the round is played out, in regards to multiple entry paths to bombsites, players must use callouts Ancient CS2. With proper team communication, you will achieve success. For example, if you are executing a split push on A bombsite from Donut and A main, it is important to call out where the enemies are last spotted, as such information can determine a positive round outcome or provide an opening.
All in all, if you are capable of mastering Ancient CS2 callouts, rest assured knowing that it will help you make smarter decisions on the map, while your teammates will be happier as the important information around the map will be transmitted easily and the timing control will be on your side.
Full List of Ancient Map Callouts
Newcomers can refer to our list of Ancient map callouts to find details about each spot on the map:
| Callout | Area | Description | Strategic Role |
|---|---|---|---|
| CT Spawn | CT side | Starting area for Counter-Terrorists. | Spawn for defenders. |
| T Spawn | T side | Starting area for Terrorists. | Spawn for attackers. |
| A Site | A bombsite | One of two bombsites on the map. | The main objective where the bomb is planted. |
| Temple | A site | Backroom hallway behind A site. | Great for retakes and post-plant. Shadow can be seen. |
| Triple Box | A site | A bunch of crates stacked near the bombsite. | Offers cover for anchors and is used for post-plant scenarios. |
| CT Lane | Route to A | Pathway from CT spawn to A bombsite. | Provides an opportunity to rotate into the A site. |
| Long | Route to A | A long pathway that leads Ts into the A site. | Control point for Terrorists. |
| A Halls | Route to A | The hallway that links Long to A Main. | Neutral area occupied by Ts. |
| A Main | Route to A | Go-to access point for Ts into the A site. | Initial contact zone for both sides. |
| Stairs | Route to A | Stone steps near Long. | Exceptional off-angle position. |
| A Boost | Route to A | Boostable spot overlooking the A Main exit. | Provides unexpected coverage of A Main entry. |
| Big Box | A bombsite | Large box on A, also known as Default. | Great for isolating duels. |
| Single | A bombsite | Small box covering Default. | It can be used as a not-so-great cover for duels. |
| Plat | A bombsite | Elevated platform near A site. | Opportunity to catch opponents off guard. |
| Donut | A bombsite | Connector room linking Mid and A Site. | Important for both CTs and Ts due to split opportunities. |
| Short | Mid | Fast and short route from Mid to A bombsite. | An additional point of entry for the attacking side. |
| B Site | B bombsite | One of two bombsites on the map. | The main objective where the bomb is planted. |
| Pillar | B bombsite | Central pillar on B bombsite. | Provides opportunity for crossfire and anchoring. |
| Lamp Room | Route to B | Small room before entering B Main. | Commonly used as a hub to launch utility. |
| Cave | Route to B | Narrow corridor close to B Main. | Very important chokepoint that both teams fight for. |
| Heaven | B bombsite | Elevated CT angle that overlooks the B bombsite. | Excellent for holds and retakes that can surprise the enemy. |
| T Lower | T side | Pathway that leads toward the Mid positions. | Control enables an additional point of entry towards Mid. |
| Ramp | T side | Slope connect T area and Mid. | Provides early Mid pressure for Ts. |
| B Boost | T Side | Boost spot close to B Main. | Elevated angle that can catch CTs off guard. |
| Back Halls | Route to B | Pathway behind B Site. | Important for CT flanks and retake scenarios. |
| Dark | B bombsite | Shadow corner next to the B bombsite. | Multi frag spot that can leave Ts wondering. |
| Alley | Mid | Tight lane that connects Mid to B. | Allows splits into B bombsite. |
| Mid | Mid | Large fighting area on the map. | Important for both teams due to rotation capabilities. |
| Pit | Mid | Low-ground area of Mid. | Pushes often lead to clashes in this position. |
| Red | Mid | Red room in the middle of the map. | Used by CTs to gather information and to play tight angles. |
| Elbow | Mid | Bend in the Mid pathway. | Important for both teams due to control. |
| Connector | Mid | Alley linking Mid to the CT areas of the map. | A very important part of the map for CTs. |
| Water | Mid | Parts of the map are covered in water. | Important information that provides pathing of Ts or pushing CTs. |
A Main – Important Entry Point if Attacking the A Bombsite
A Main is placed as the entry path for the attackers interested in reaching the A bombsite. Early on, this is one of the most contested choke points on Ancient. Due to the narrow design of the spot, CTs are looking to get easy pick-offs by holding tight angles. Timing is very important here. Defenders need to properly use utility like molotovs and smokes to relieve the pressure and protect the bombsite.
If you are attacking this part of the map, A Main control is very important as it provides the first point of contact into the bombsite and provides an opportunity to quickly enter the site. This bombsite can be defended by a single person, also known as the anchor.
As for the positioning, A Main control puts a lot of pressure on the defenders due to CTs having to constantly hold the angle which puts additional pressure on other parts of the bombsite such as Donut.
Donut – Exceptionally Important Part of the Map Leading to A Bombsite
Donut is a hub connecting Mid and A bombsite. This is by far the most strategically important position on the entire map. It can be played in different ways due to multiple angles and corners that can be covered. Keep in mind that shadows play a big factor in determining whether there is someone holding Donut or not.
On the defensive side of things, CTs want to lock down Donut, preventing the attackers from having an additional access point toward the A bombsite. If the Ts are planning on splitting A bombsite, then control of Donut is very important. Timing is important for this one. In most instances, whoever has control of Donut will win the round.
If Donut is pushed, it means that additional pressure is put on the A site. For that reason, players need to call for potential flanks or entry on A site. If an attack is coordinated well, attackers will burst from A Main, putting pressure on defenders, while Donut wrap will secure the entry.
Temple – Crucial Anchor Point for the Defenders
Temple has a unique position on the map. It can be found behind the A bombsite. It is primarily used as a defensive structure suited for a player posting there with a sniper rifle. With its shape, it provides solid coverage toward the A Main position, giving the anchor a strong advantage.
Temple is one of the few spots on Ancient that provides enough space to fall back if the site is overrun by the attackers. However, players should be careful as Ts can access Temple from Mid. With enough time, they can catch CTs from behind and turn the round in their favor.
When attacking, a Temple can be approached in two ways. It can be either cleared or completely ignored with a smoke or molotov. Timing plays an important part in securing or ignoring the Temple position. If the attackers are too slow, players holding Temple can adjust and set their team up for a strong retake position. All in all, Temple plays an important role when it comes to retakes. CTs who push Temple can strike from deep behind the site, causing problems for defenders who are caught on the bombsite.
A Site – Attacked and Defended From Multiple Positions

A site is a wide area that allows Ts to plant the bomb. The site itself is surrounded by different structures and obstacles that can be effectively used to stop the retake or attackers from storming the bombsite. Some of the most important angles on A site are Default and Pillars. To put things into perspective, the A bombsite is very open and can be shot at from multiple angles, including A Main, Donut, and Temple.
For defenders, it is important to play as a team. During the early round, one player is usually enough to anchor the A bombsite. If needed, he can call for help as rotations are safe and quick. Attackers, on the other hand, must approach A site with synergized utility that covers the most important contact points.
A site on Ancient is not attacked as often because the execution has to be well-prepared. The highest chance of winning a round on A site revolves around accessing the bombsite from A Main and Donut. If CTs lose control of Donut, A bombsite is right there for the taking.
Mid – A Position That Shapes the Outcome of the Round
Mid is among the most important strategic parts of the Ancient map. The layout itself offers various obstacles and terrain elevations. Players can take cover behind various curbs or hold off angles to try and catch the other side off guard. Whoever owns Mid control during the early round has a round priority, as it is very easy to throw fakes and pull rotations from one to the other bombsite.
Defenders generally hold Mid from different angles, such as Donut, and Red, while some teams might decide to play more aggressively and smoke chokepoints, preventing Ts from accessing Mid.
All in all, Mid should be a priority for both teams. Effective teams and players will use Mid control to play mind games. This can help them figure out where the opponents are rotating. Essentially, it improves timings and helps coordinate attacks much better.
Cave – Pathway Granting Access to Mid and B Bombsite
The cave is yet another important puzzle on the Ancient map. It covers Ts’ access to Mid while it can also secure an additional entry toward the B bombsite. It is important to grasp early control of Cave through proper usage of the utility. Defenders can post deep in the Cave and cause mayhem by holding tight angles. On the other hand, attackers can post one player inside the Cave to hold information.
Unlike other places on Ancient, the Cave allows access to Mid and B bombsite. It is important to note that this position on the map can be attacked or defended with either Shotguns or SMGs. Players do not have to go for an all-out buy just to control the Cave. This is possible due to the very short distance between the corners and the narrow tunnels.
When achieving map pressure, having presence in the Cave is important. By doing so, attackers can take an action on either B bombsite, or they can fall back to Mid if they sense that there are multiple defenders on B.
B Ramp – Position That Can’t be Unprotected
B Ramp is the single primary entrance toward the B bombsite for the attackers. It features a tight pathway with a steep rise in elevation. Based on our experience, a lot of early engagements are happening around the Ramp position. The angles are not as hard, but with the boost on Box, Ts can catch defenders holding the long position off guard.
For the defending side, having proper control of the B Ramp position is critical. This can prevent attackers from walking into the bombsite and clearing angles. Utility should always be used at the start of the round to prevent a potential rush. The attacking side often launches utility from Ruins which effectively steers them to the B Ramp push.
Having eyes on B Ramp throughout the round is very important. Defenders can keep the Ts honest. Without enough space, it can be hard to pounce from B Ramp as the angles are tight and often lead to multiple kills if the utility is not used by the attackers.
B Site – Tight Angles Granting Enough Cover For Defenders

B site is architected in a stunning way, as it allows both the attackers and defenders to take their chances. There are several important positions located on the B bombsite including Pillar, Back Halls, and House. Most corners on this bombsite are tight, making the utility even more important.
To access the bombsite, attackers need to effectively use smokes and molotovs, while flashbangs can help Ts clear different strong corners CTs tend to hold. Timing is everything on the B bombsite. If a defender gets caught with a nade in hand, the round is likely lost.
With that being said, the B site is very important. Despite multiple angles CTs can take during the retake, Ts have more than enough coverage to slowly drain the timer and make it a grueling round. All in all, teamwork is crucial for winning a round when the focus is set toward B bombsite.
Red – Hallway That Can Turn the Round on Its Head
Red Room is a defensive structure used by the CTs to fend off Mid attacks. It has an insanely powerful angle that overlooks the entire Mid part of the map. It is important to note that the angle is excellent, as only a part of the defender’s head is sticking out from the Red Room, making the defender a hard target to hit.
For the attackers, Red Room is a big problem. Early in the round, this position is usually smoked off. Only then will players claim access to Donut where they can engage defenders. Moreover, if Red Room is controlled by the Ts, then the rotations can be blocked.
Red is an important part of the map, especially for the CTs. Plays on Mid must include a player in Red who can provide either utility coverage or pick off players who are focused on clearing the Donut position.
Elbow – Narrow Pathway That Allows Access to Mid
Elbow is a very narrow and tricky turning point between accessing Mid and the route to the B bombsite. This is a crucial choke where players do not have any visibility. This forces players to go for wide peaks making the round unpredictable.
CTs have an important task early on in the round. They can use incendiaries, smokes, or HE nades to block the initial push. Contrary to that, Ts have to decide whether they want to push the fire or smoke for a chance to catch defenders and break open the round.
It goes without saying that the Elbow can’t be held throughout the entire round by the defenders. There are a lot of different angles Ts can come from to clear this part of the map. However, once enough time has passed, defenders can fall back and allow Ts to reclaim that part of the map which leaves them with less utility and time to storm a bombsite.
Learning and Practicing Ancient Map Callouts – Improving Timing & Rotations
It is not possible to understand Ancient map callouts right off the bat. You will have to put in the hard work to become a master. To give you a helping hand, we have prepared a detailed list of practical tips that will improve timing and help you catch rotations on Ancient. Here are the details:
- Walk through the map: If you are just starting out, simply load the map and slowly walk through it to figure out the most important areas on the map. Learn how rotations work, what it takes to attack and defend a bombsite. By doing so, you will cover the basics regarding the map callouts on which you can build upon.
- Practice with bots: Once the basics are out of the way, it is time to start the game with bots. With the basic training, you will understand the simple angles bots will hold. This will improve the muscle memory.
- Play scrims with or against teammates: Playing scrims is by far the best way to practice various strategies on the map. Your friends can play with or against you. After the game, you can exchange experiences on what worked and what did not including holds, angles, and executes.
- Prepare attacking strategies/executes and defensive holds: Before playing a competitive match, it is important to learn basic utility, at least. This revolves around smoking important parts of the map. Players should also practice defensive holds revolving around held angles and rotations if one of their teammates dies early in the round.
- Learn map timings: Take time to spectate bouts played on Ancient. If you do so, it will help paint the picture regarding map timings. For example, the initial spawn for the attacking side plays an important role in taking mid control.
- Watch pro players compete on Ancient: Last but not least, we want to address the importance of watching how professionals play on Ancient. Remember utility line ups, timings, and held angles. This will greatly improve your winning rate on Ancient.
How Callouts Improve Competitive Play on Ancient
CS2 Ancient callouts play a very important role which can determine a round winner or a loser. It all starts with early pressure where players need to disclose information quickly so that control can be taken. It will help players figure out potential pushes or flank attempts. To put things into perspective, a simple information that one player is pushing B ramp can make or break the round as the odds will heavily change if the game ends up being 4v5 due to correct information being distributed the right way.
As mentioned above, taking mid control on Ancient is very important. That is why gamers need to understand callouts such as Cave, Donut, etc. With it, your teammates will know what corners to pre-fire. This can lead to fast kills and get your team rolling early on.
Ancient map callouts CS2 are used to prepare executes as you will relay information to teammates on what type of utility should be used to cover parts of the map where the enemy is holding.
Callouts are also important when going for retakes. As a matter of fact, they are more important that way as the right information can sway the round in your favor. Bear in mind that communication needs to be as simple as possible containing just the right amount of information.
Finally, callouts will improve the game in a way that the anchor can receive the necessary information that is happening around the map and adjust accordingly. For example, if you lose Cave control, it is important to let the A anchor know that the enemies might be lurking from behind.
Tips for Mastering A Site, Mid, and B Site on Ancient
Interested in getting the most out of every round played on Ancient? If that is the case, we have got you covered. In this section, you will find a list containing actionable advice covering the three most important parts of the map:
- B Site: On the B site, make sure to take advantage of tight angles and short distance duels. Defenders should play around short and long positions, while Cave control can be held by a single player who should use utility like smokes and incendiaries. The attacking side should cover long with a simple smoke line up to get access to the bombsite while retakes can be defended from different sides including the Ramp position. Keep in mind that at least two defenders should cover the B site.
- Mid: This is by far the most important part of the map. It should be approached carefully by both sides because one mistake can open the round and provide an opportunity to wrap from behind. Defenders should focus on restricting mid access with utility. On the other hand, attackers can use various ways, such as the Connector, to get additional points of entry and control. Clearing Donut on Mid is very important as it will limit the amount of information available to defenders.
- A Site: In our experience, this is an easier site to play around, due to the angle control and simple points of entry. Defenders must cover two main entries including A Main and Donut. There are a lot of off-angles you can hold on this site to catch the attackers off guard. Utility is once again crucial. The longer the A Main is blocked, the safer the defender on the site is. This position can be easily held by an anchor if the information is accessible from Mid.
Final Thoughts on Mastering Ancient Map Callouts in CS2
It does not matter if you are playing the game as a 5-stack or as a solo, mastering Ancient CS2 map callouts is very important as it improves synergy, coordination, and overall, it helps you secure more rounds without having to work so hard for them.
The fact is, Ancient is a very demanding map requiring extensive knowledge in terms of utility, crosshair placement, and movement. Everything on the map is tight, meaning callouts need to be on point, otherwise, they will mislead your teammates and get them killed.
Remember to keep things simple and straightforward. By doing so, you will allow your teammates to set up game-changing plays and catch timings and rotations. All in all, mastering CS2 Ancient map callouts is just the beginning. If you can combine callouts with raw aim and proper utility usage, you are setting yourself up for success.
If you’re also interested in skins and where players usually trade, upgrade, or use them outside of official Steam features, check our overview of the best CS2 gambling sites – it covers the key safety signals to look for before using any third-party platform.
FAQ
What are the most important callouts on Ancient in CS2?
The most important callouts on Ancient in CS2 revolve around A Main, Donut, Cave, B Ramp, and Temple. These are the most important locations as they provide players with the necessary control to sway the round in their favor.
How do callouts improve Mid control on Ancient?
Mid control on Ancient is very important hence why callouts are vital, if done properly. With the Mid callouts, players need to relay information about the enemy movement around Cave, Mid doors, and especially Donut. With straightforward communication, certain angles are cleared in more detail. This can result in additional kills.
Why is Donut such a critical rotation point on Ancient?
Donut is a critical rotation point on Ancient because it links Mid to A Site while providing a rotation towards the CT spawn as well. For that reason, this is one of the most important spots on the map both CTs and Ts are looking to control. If CTs lose Donut control, they are prone to split A attack which often leads to easy rounds.
How can beginners learn Ancient map callouts efficiently?
To learn Ancient map callouts efficiently, beginners should follow guidelines and tips. For example, we advise newcomers to walk around the map to feel the angles and figure out how the map is positioned. On top of that, learning callouts by heart is a good idea. It will help to practice with teammates or with bots.
Are callouts different between CS2 and CS:GO versions of Ancient?
Keep in mind that nothing has changed between CS2 and CS:GO versions of Ancient. For that reason, callouts remain the same. With that in mind, players should understand that CS2 brought in improved lighting and visibility which changed the way the map appears.
Which callouts matter most for coordinated A Site and B Site pushes?
If you are playing around A Site, these are the most important callouts you should know about: A Main, Temple, and Donut. On the other hand, the most important B site callouts include: Cave, B Ramp, Long, and Default. With these callouts, you have the most important parts of the map covered.