


All Inferno Map Callouts in CS2 – Complete Guide for 2026
If you’ve played CS2 for more than five minutes, you already know how chaotic Inferno can get. Clear callouts keep your team alive and your comms clean. So yeah, no matter if you’re holding Banana, setting up smokes for A, or trading bullets on B site, it really helps to know the right Inferno map callouts. It is what turns panic into coordination.
Why Knowing Inferno Callouts Matters in CS2
Inferno is one of those maps where a single bad call can cost you the round. It’s full of tight choke points, tricky angles, and constant utility pressure. If your teammate yells “one in Boiler” and half the team doesn’t know where that is, you’re already in trouble.
Using clear Inferno callouts CS2 keeps everyone synced. When someone says “two pushing Banana” or “one pit, one site,” your team instantly knows how to react, rotate, trade, or throw a molotov to slow the push. That’s the kind of coordination that wins rounds.
CS2 Inferno map callouts are a big part of every strategy on this map. Knowing every position on Inferno helps you plan, execute, crossfire, and rotate like a pro. The more accurate your calls, the smoother your team plays. And once everyone speaks the same Inferno language, even random ranked games start to feel like a well-drilled scrim.
A Site Area – Classic Crossfires and Utility Setups
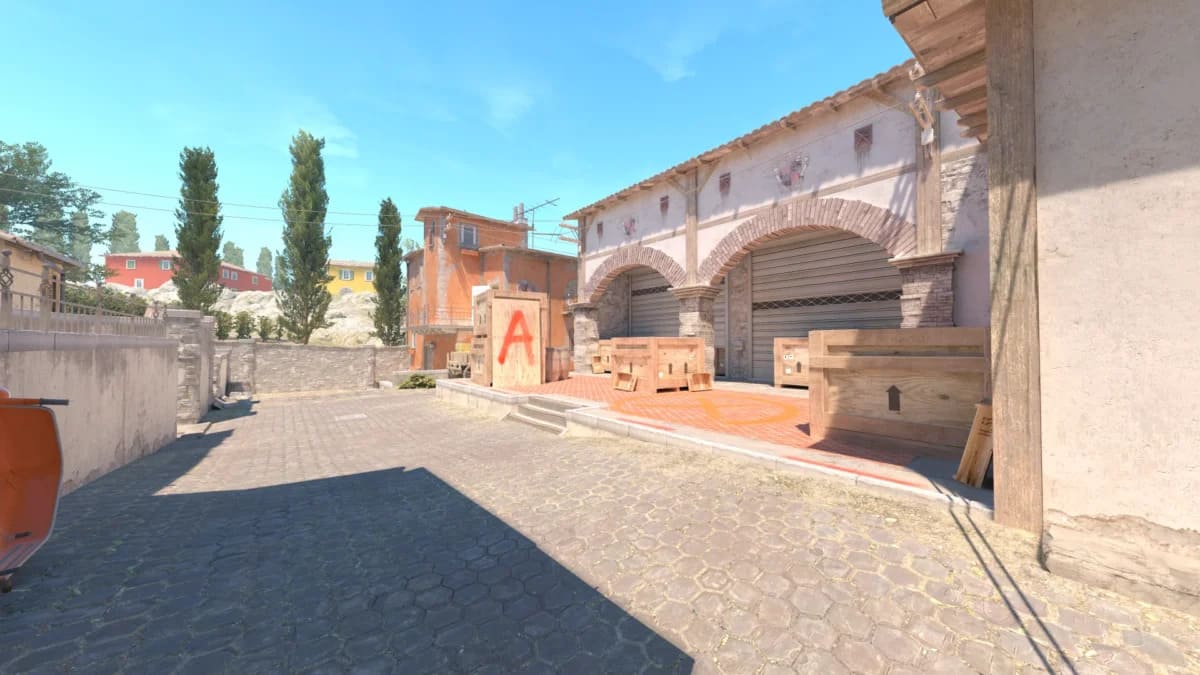
The A Site on Inferno is one of the most tactical areas in CS2. It’s where timing, teamwork, and communication decide rounds. The A Site rewards coordination and precise Inferno CS2 callouts.
Key Inferno A Site Callouts
- Site / A Site – the main platform where the bomb gets planted.
- Pit – the low ground area beside the site, connecting the Cemetery and the Balcony.
- daddyskins.com
- Graveyard – the corner near Pit, often used by CT-defenders for cover and rotations.
- Balcony – elevated bench/ledge overlooking A site; Ts often jump down here, CTs may hold from behind.
- Short / A Short – the shorter route from Mid/Top-Mid leading into A Site. Ts will use this for quicker entries.
- Long / A Long – the longer, more open route from Mid through Library/Arch into A Site; often a CT hold or T pressure point.
- Truck / Behind Truck – the truck near Balcony/A Long area, valuable cover spot for CTs.
- Library – area controlling Long and Top Mid; CTs often hold here, Ts need to clear.
- Arch & Moto – Arch provides a view over Mid/T Apps area with potential rotation; Moto (between Arch and A site) is a key rotation zone for CTs.
Common A Site Tactics and Comms
- T-Side Execute / Entry:
Call: “Flash Short, go Balcony! Two on Balcony, one Pit.”
Use smokes and flashes to block Library and Long, then entry through Short + Balcony. Once the Balcony is clear, push the site and plant for Pit or Truck. Utility usage (smoke, molly) is key to isolating defenders.
- CT-Side Anchor / Crossfire / Retake:
Call: “I anchor Pit, you hold Long corner; rotate Arch if I call ‘half site’.”
CTs hold predetermined positions (Pit, Graveyard, Truck, Library) and coordinate rotations. If you hear “Half site, rotate Arch,” you move accordingly to hold crossfire or support.
- Mid Control to A Split:
Call: “We’re doing Mid control, then Short/Long split A in 5.”
Gaining Top Mid or Library control allows a split push into A via Short + Long. Map control and timing matter: Ts use this to pressure, CTs use it to react and create crossfires.
- Utility Setup Specifics:
Call: “Molly Pit, smoke Long and Library, flash Balcony entry. Go!”
Effective setups revolve around using utility to deny CT vision, damage, or reposition them before the entry collapse.
B Site Area – Anchors, Utility, and Retakes
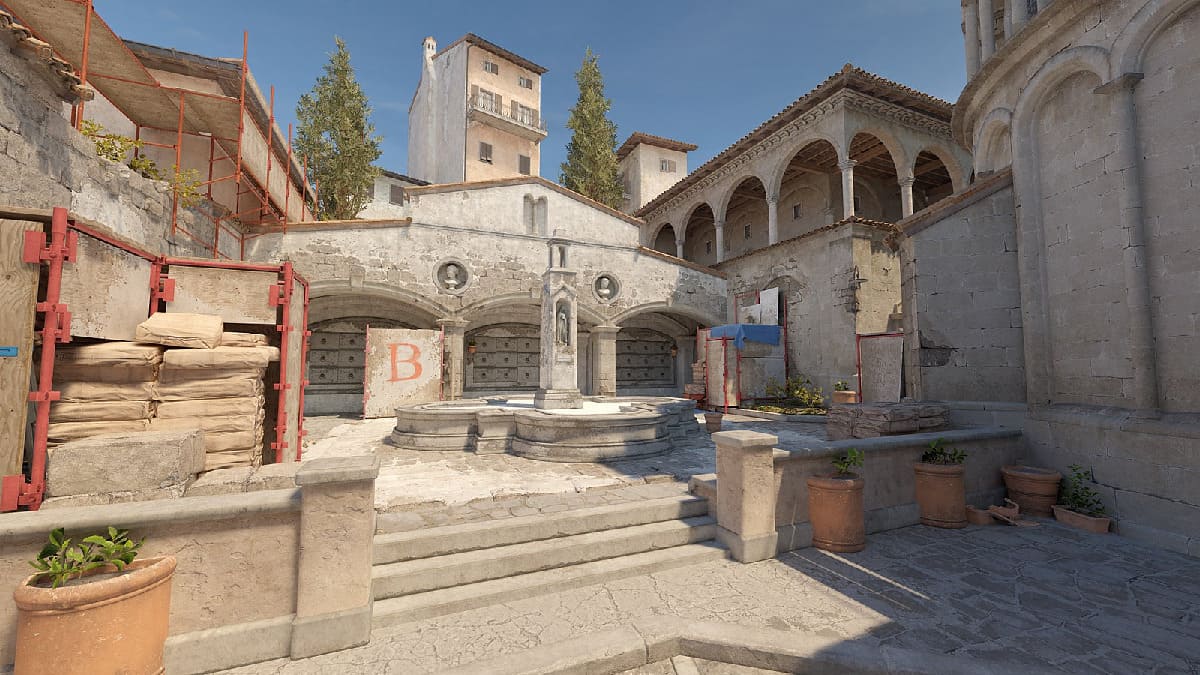
The B Site on Inferno is all about pressure and precision. It’s the most contested part of the map, where good utility and quick rotations make or break a round. Smart Inferno map callouts CS2 here help your team survive Banana rushes, for example.
Essential Inferno B Site Callouts
- Banana – long path leading to B; early nades and smokes decide control.
- Car – cover spot near the top Banana, used for early peeks or off-angles.
- Sandbags – common hiding spot for CTs during early Banana fights.
- CT / Coffins – rotation spot and cover area behind site; strong for AWPers.
- New Box (First Oranges) – closest box to Banana entrance; key anchor spot.
- Dark / Backsite – corner near the back wall; perfect for late-round plays.
- Second Oranges – cover next to the new box; often used for crossfires.
- Ruins – entry area after CT spawn; used for retake setups.
- Construction – connects B site to CT spawn; major rotation route.
Holding and Retaking B Site in CS2
Holding B Site is all about delay and coordination. CT anchors use molotovs, smokes, and flashes to stop early pushes and call rotations. These are some Inferno B callouts:
Call: “I’m smoked CT, they’re lining up smokes, get one rotate!”
The main crossfire sits between New Box, Second Oranges, and Dark, where one player holds contact and the other swings for the trade. You’ll often hear comms like:
Call: “One pool, one site dead, bomb down B!”
During retakes, CTs regroup from Ruins and CT, throwing flashes over the roof to clear the site. A classic call sounds like:
Call: “Flashing CT in 3…2…1… go!”
Perfect timing, clean comms, and well-spent utility turn B from a panic zone into a stronghold. When your anchors buy time and your rotations are sharp, Inferno’s toughest bombsite suddenly feels a lot easier to defend.
Mid and Second Mid – Timing, Pressure, and Map Control
Mid and Second Mid are the lifelines of Inferno. Control this area, and you decide the pace of the round. For T-side, these CS2 callouts Inferno are the gateway to A executes and rotations; for CTs, it’s the info hub that tells you whether to stack or rotate.
Core Mid and Second Mid Callouts
- T Mid / Top Mid – open area connecting to Short and Long; main T staging point.
- Second Mid – parallel lane near Apartments; often used for silent lurks or early pressure.
- Alt Mid – connects T Spawn to Second Mid and Apartments; used for early map control.
- Underpass / Mexico – tucked spot under Alt Mid stairs; good for sneaky plays.
- Short / Porch – route from Top Mid to A Site; main T entry line.
- Long / Arch – connects Top Mid to Library and A Site; often controlled by CT AWPers.
- Boiler – doorway between Mid and Apartments; strong for CT info or T picks.
- Cubby – small corner on Short used by CTs for close holds.
- Hay / Hay Bales – top Mid cover spot for peeking or delaying pushes.
- Mid Wall / Brackets – area near Short-Long intersection; main fight zone for map control.
How Teams Use Mid Control to Split Sites
Controlling Mid is about pressure and space. When Ts take Top Mid with smokes on Long and Short, they cut off vision and force CTs back. That’s when the callouts Inferno CS2 start flying:
Call: “Boiler dead, one Arch holding!”
From there, teams can split A using Short and Long, or fake presence to pull rotations off B. Good communication, “One still in Library, one rotating Moto”, helps Ts coordinate fast site hits.
CTs, on the other hand, use counter-nades and crossfires at Brackets to contest control early. They’ll call things like:
Call: “Flashing Top Mid, peek Short!” to regain pressure and deny a full T take.
Mastering mid control on Inferno is about rhythm, applying pressure, forcing utility, and reading rotations. The teams that win Mid usually win the round, because from there, every site split becomes an open playbook.
Apartments – Lurks, Defaults, and Entry Setups
The Apartments on Inferno are a playground for lurkers and entry fraggers. Teams use this area to apply pressure on A, control Second Mid, and set up quick executes through Balcony or Boiler.
Inferno Apartments Callouts
- T Apartments / T Apps – starting area near Second Mid; where Ts default or set up early plays.
- Balcony – the ledge overlooking A Site; a key entry point for fast executes.
- Bedroom / Bed – room inside Apartments facing Mid; good for T defaults and lurk plays.
- Boiler – connector between Mid and Apartments; used for CT aggression or T pressure.
- Hallway – main corridor running through Apartments; teams use it to group for A executes.
- Window Room – back section with windows looking into Mid or Second Mid; solid off-angle for lurks.
- Stairs / Apps Stairs – slope connecting Apartments to Second Mid; used for repositioning or rotations.
- Carpet / Upper Hall – area leading toward Balcony; strong pre nade spots for Ts before pushing site.
Common Push and Clear Strategies
T-side: Apartment control usually starts with one player walking up the Hallway while teammates hold Second Mid and Boiler. Smart entries use utility damage to flush CTs out of close corners. A typical comm sounds like:
Call: “Flashing Balcony, drop Pit together!”
Teams often pair a Boiler peek with a Balcony jump, splitting A defenders and catching them off guard. Good timing here can turn a 50/50 fight into a clean entry.
CT-side: One defender typically holds Short or Boiler while another plays Balcony or Pit for the trade. Communication keeps this setup alive:
Call: “I heard steps Apps, one close Hallway!”
Flashes through Boiler or balcony peeks can reset control mid-round. The key is to listen, trade, and coordinate. Winning Apartments early means setting the tone for the entire A Site execution.
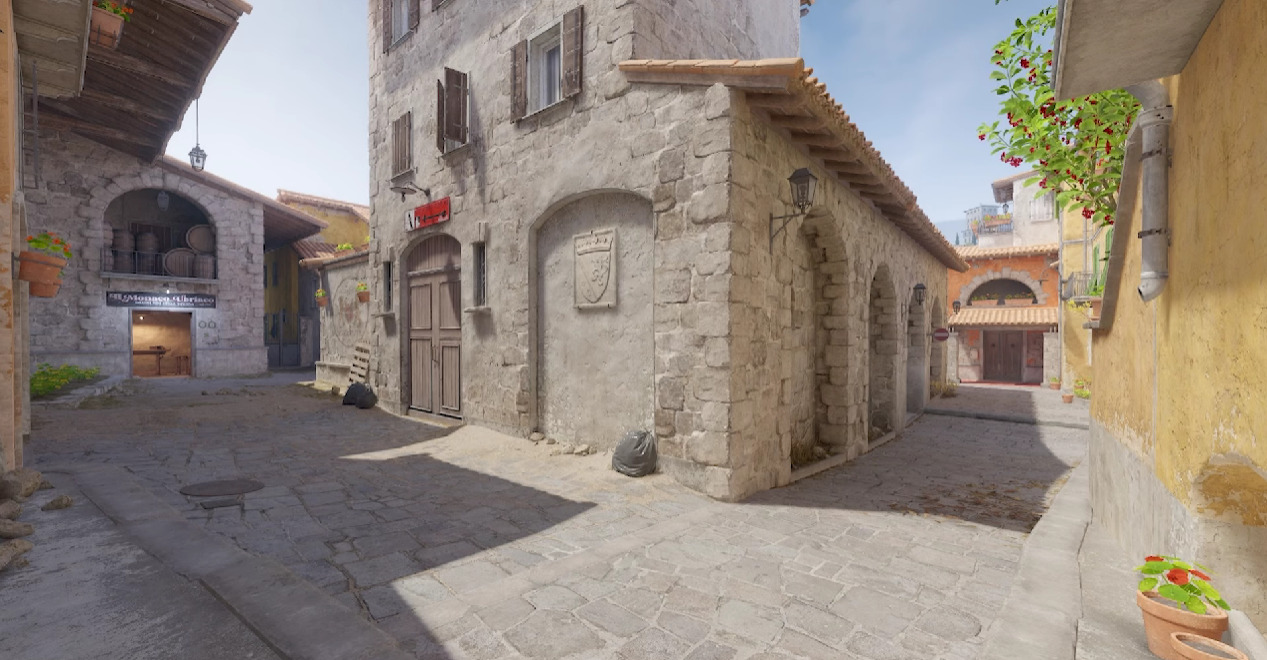
Banana – The Most Contested Part of Inferno
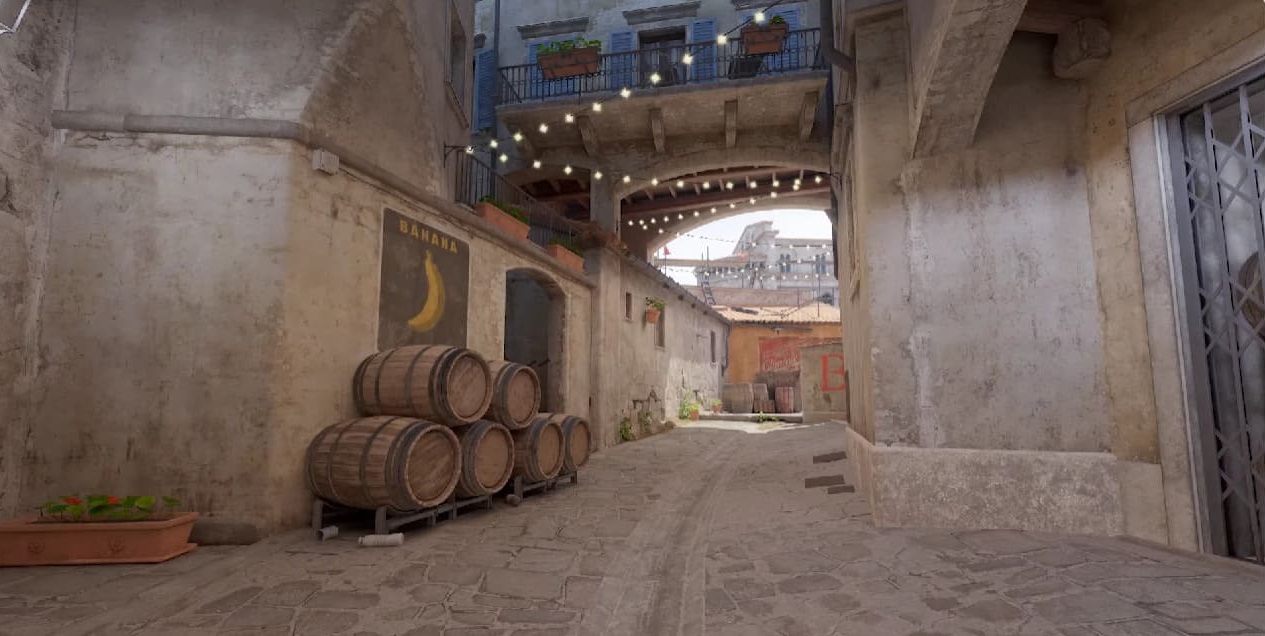
If there’s one lane that defines Inferno, it’s Banana. Every round starts here with a battle of utility, timing, and nerves. It’s the path to B Site, but also a tug-of-war for map control.
Vital Banana Callouts
- T Ramp / Bottom Banana – where Ts line up early nades or lurk for picks.
- Logs – right corner near Bottom Banana; strong off-angle for CTs holding early.
- Car – halfway up Banana, used for CT aggression or cover.
- Half-Wall – mid-Banana divider; key line for controlling space and resetting.
- Sandbags – tucked right corner by Half-Wall; dangerous but powerful hold spot.
- CT Smoke / Deep Smoke – area near the bend before B entrance; common for blocking vision.
- Top Banana – final stretch before B entrance; high-risk zone for both sides.
- Coffins / CT Cross – rotation area and common AWP hold.
- New Box / Oranges – close B-site cover after Banana entry.
Utility, Smokes, and Nade Lineups for Banana
Banana is all about utility trading. Early in the round, CTs dump molotovs and HEs to delay control, while Ts counter with deep smokes and flashes to push forward. Some of the Inferno CS callouts are:
Call: “I’m mollying Logs, flashing over Half-Wall, peek after pop!”
Ts often use a structured utility set to take space safely:
Call: “Deep smoke CT, molly Sandbags, flash top, clear Car together!”
Once Banana is secured, it opens up macro play options. Ts can fake presence, pull rotations, or regroup for late B executes, while CTs can retake control with coordinated utility and timing.
Arch, Library, and CT Rotations – Smart Positioning and Calls
The Arch and Library area on Inferno is the brain of CT defense. It connects A Site, Mid, and B rotations. Hold it well, and you can shut down splits, support teammates, or rotate fast to save a site.
Play it poorly, and you’ll open the entire map. Strong communication here turns risky rotations into round-winning moves.
CT Rotation Callouts You Should Know
- Arch – curved pathway from Mid to Library and CT spawn; key for rotations and A-site holds.
- Library – room next to Arch that overlooks A Long; safe for AWPs and crossfire setups.
- Moto – narrow area between Arch and A Site; used for smoke lineups and rotation calls.
- CT Spawn – central connector between A and B; primary rotation route for defenders.
- Ruins / Construction – entrance to B Site from CT; critical in retake and post-plant scenarios.
- Long Corner / Pillar – defensive angle near Arch, great for peeking Mid or delaying pushes.
- Speedway – route behind CT spawn toward B; used for fast repositioning.
How to Communicate Rotations Effectively
Good rotations are less about speed and more about clarity. If you call “rotating through Speedway,” your team instantly knows B will be reinforced, and A needs to play safe.
Short, calm comms like:
Call: “One Arch smoked, I’m rotating CT.” or “Library smoked off, holding Moto gap.”
Keep your team aligned during chaos.
When Ts execute mid splits, Arch and Library players must decide fast whether to anchor, retake, or fall back. Example comms:
Call: “They’re out Short, leaving Arch, stay A!”
During retakes, rotation calls like:
Call: “Two CT, one Ruins, flashing in three!”
Help synchronize utility and peeks. These micro-communications often decide whether your team trades effectively or walks into crossfires.
T Spawn and Early Round Pathing – Setting Up the Round
Every Inferno round begins at T Spawn, and what happens in those first 10 seconds can shape the entire match. Early pathing and calls decide whether your team fights for Banana control, takes Mid presence, or runs a quick A rush.
Good comms here mean everyone knows their role before the first flash pops.
Inferno T Spawn Callouts
- T Spawn / Spawn Steps – starting zone where Ts buy gear and choose early paths.
- T Ramp – slight incline leading toward Banana; perfect for early nades or peeks.
- Alt Mid Entrance – connects T Spawn to Second Mid and Apartments.
- Second Mid – common early path for controlling Apartments or faking mid pressure.
- Bottom Banana / Logs Area – main staging point for early Banana control.
- T Mid Corner – safe hold to spot CT aggression from Top Mid or Boiler.
How Early Calls Set the Pace for the Round
Strong teams use spawn calls to organize roles and timing before leaving base.
For example:
Call: “Two Banana, one Apps, one Boiler, I’ll hold Mid.”
Instantly defines positions and utility responsibilities.
Early-round communication focuses on control:
Call: “Deep smoke Banana, molly Logs, peek after flash!” – for map pressure.
Call: “No sound Second Mid, default hold.” – for slow lurks or baiting CT utility.
Coordinated openers also help teams fake control. Sending two players Banana while others hold Mid can trigger early CT rotations, giving Ts an advantage later in the round.
Comparison Table – Most Useful Inferno Map Callouts in CS2
Here’s a table with the most useful and most popular map callouts on Infernmo in CS2.
| Callout | Location Description | Used By (T / CT / Both) | Typical Purpose | Example In-Game Call |
|---|---|---|---|---|
| Banana | Long lane leading to B Site | Both | Early control, utility fights | “Two pushing Banana!” |
| Sandbags | Corner near Half-Wall on Banana | CT | Early pick or anchor position | “One close Sandbags!” |
| Car | Halfway up Banana | Both | Aggressive peek or off-angle | “Car dead, Banana clear!” |
| New Box / First Oranges | Closest cover on B Site | CT | Anchor or post-plant position | “One New Box, molly him out!” |
| Dark / Backsite | Shadow corner at back of B | CT | Late-round hiding spot | “Last Dark, flashing in!” |
| Coffins | Behind B Site, facing Banana | Both | Post-plant cover or retake spot | “He’s Coffins, peek now!” |
| Pit | Low area beside A Site | CT | Crossfire with Site or Balcony | “Two Pit, one Graveyard!” |
| Graveyard | Corner behind Pit | CT | Off-angle for surprise kills | “Graveyard dead, site open!” |
| Balcony | Overlooks A Site | Both | Entry or defensive hold | “Jumping Balcony, flash me in!” |
| Short / Porch | Route from Mid to A Site | Both | Main T entry path to A | “One close Short, trade me!” |
| Long / Arch | Path from Mid to Library | Both | Rotations, A splits | “Long smoked, AWP Library!” |
| Library | Room beside Arch on A Long | CT | Defensive hold or rotate cover | “They smoked Library, can’t see Long!” |
| Boiler | Connector between Mid & Apartments | Both | Mid fights and info plays | “One in Boiler, flashing!” |
| Second Mid | Parallel lane near Apartments | Both | Early lurk and default zone | “Quiet Second Mid, holding push.” |
| T Apps / Hallway | Apartments corridor above A | Both | A executes and lurks | “One in Hallway, ready to drop Balcony!” |
| CT Spawn | Connector between A & B | CT | Rotation and retake route | “Rotating CT, stay alive B!” |
| Arch / Moto | Curve from Mid to Library / A Site | Both | Control and crossfire setup | “Arch smoked, playing Moto gap!” |
| Ruins / Construction | Entrance to B from CT | CT | Retake staging area | “Two Ruins, flashing over!” |
| Mid / Top Mid | Central area connecting routes | Both | Map control and split attacks | “We have Mid, setting up A split.” |
| Alt Mid / Underpass | Route connecting T Spawn and Apartments | T | Lurking or late-round fakes | “Walking Alt Mid, hold sound.” |
Once you’ve learned Inferno callouts and your communication becomes automatic, it’s much easier to enjoy the rest of the CS2 ecosystem – from building a clean inventory to exploring third-party platforms safely. If you’re looking for reputable options, see our guide to the best CS2 gambling sites, where we compare platforms based on security, fairness, and overall user experience.
Common Questions About Inferno Callouts in CS2
How do I memorize CS2 Inferno callouts quickly?
Play deathmatch or custom lobbies on Inferno while repeating callouts out loud. Use minimap guides and practice with friends until the names stick naturally.
Which callouts are most important for beginners?
Focus on major spots: Banana, Pit, Balcony, Short, Long, and CT. These are called every round and make up 80% of important Inferno comms.
Should I use English or my native language for callouts?
Use whatever your team communicates fastest in. English is standard globally, but consistency matters more. Everyone must instantly understand and react to your calls.
How do callouts improve team coordination in CS2?
Clear, fast CS2 Inferno callouts map eliminates confusion, speeds up rotations, and reduces wasted utility. When everyone knows exact positions, your team trades and executes far more effectively.
What’s the best way to practice Inferno comms?
Play with a fixed squad and force everyone to call every action. Record demos, review missed comms, and practice structured executes with proper call timing. Inferno CS2 map callouts will help you scale a lot!